

File Setup
File Setup
To get your order on the printer, we must receive files that are "print-ready." Print-ready means that your files meet our digital setup specifications, which are industry standard and used by nearly every other commercial printer. If you don’t fully understand what’s required to make a file print-ready, we highly recommend you work with a professional graphic designer. You can use one of your own or we can help - just ask! If you place an order and send us files that aren’t print-ready, the job will be delayed until we have the proper file(s). Here is what we need:
MARGINS
Files must be built to the product size being ordered plus an additional 0.25". This means your files should be 0.25" larger than the product size that you are ordering. For example, a 2" x 3.5" business card requires a graphic file to be sized at 2.25" x 3.75".
Leave your text and other important graphics, such as logos, an absolute minimum of 1/8" from the edge of your design. It is highly recommended that you leave 1/4" for a nice clean look after your job is cut. The machine will cut off usually anywhere from 1/16" to 1/8" off of each side. (see below)
Do not put crop marks, lines that tells us where to cut, on your file. We have our own templates and we will cut as close as 1/16" as possible.
Wrong way to setup:

Correct way to set up

When setting up your design, do not format the design on a larger document size. For example, don't start off with a document size of 8.5" x 11" and then center your design in the middle. The correct set up process is to format the size as the same dimensions of the product chosen.
DO NOT create your design file to include the front and back of your design within the same file. They should be set up as two different files.
DO NOT name your design file as just "front" or "back." Choose a file name that describes your product. For example, if your flyer is for a gallery opening, you could name your flyer design files "gallery_opening_front" and "gallery_opening_back."
RESOLUTION
The resolution or quality of your image(s) must be a minimum of 300d.p.i. If the resolution is lower we will NOT process the order because the print quality will be affected. (see below)
Wrong way to setup

Correct way to set up

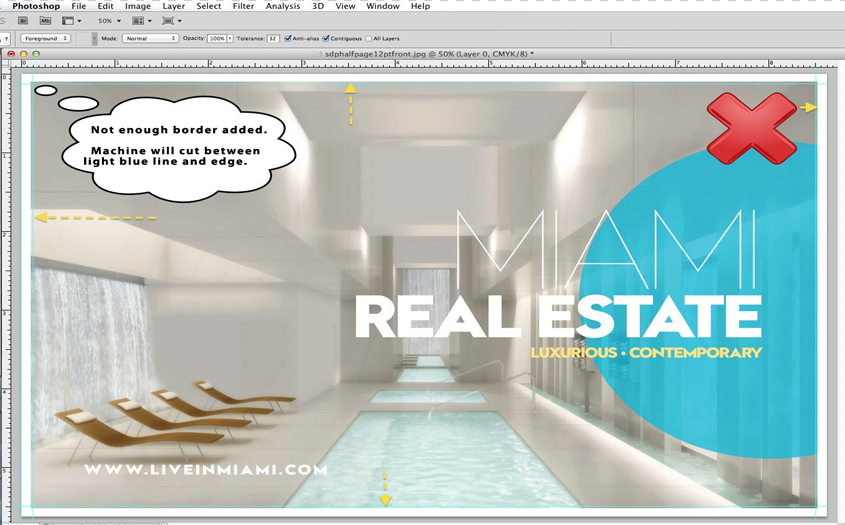
BORDERS
We do not print with a white border around your design UNLESS you design it this way. You should extend the background of your design all the way to edge of your design so that no white shows. However, leave text and other important graphics a minimum of 1/8" from the edge of your design.
Do not put a thin frame around your design. Because of the way the jobs are cut it is very difficult to cut thin frames very precisely and the finished product can come out looking unevenly cut. If you do choose to add a frame, the thicker you make it, the better. It should be at least 1/2" thick. (see below)
Wrong way to set up
Correct way to setup

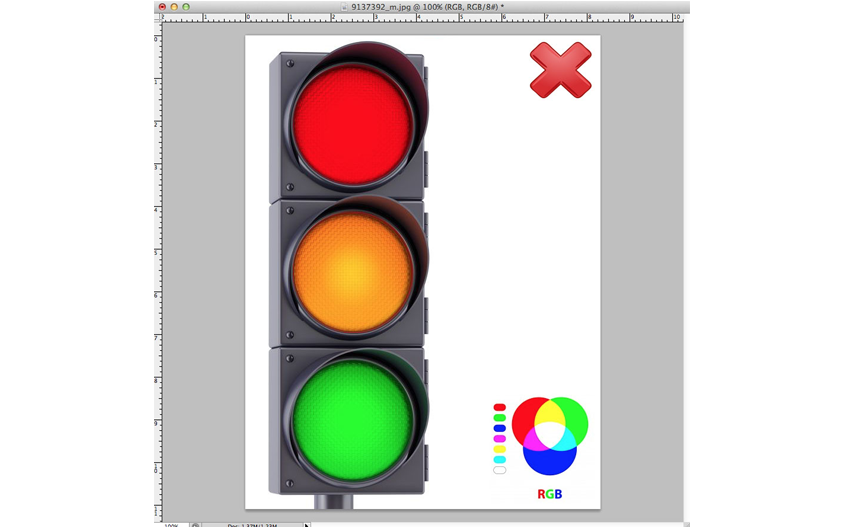
COLOR MODE
Files should be built using the CMYK color mode. All files we receive in RGB will automatically be converted to CMYK. When you convert RGB files to CMYK, a slight – but inevitable – color shift will occur on the final product. In particular blues have a tendency to turn purplish.
Wrong way to setup
Correct way to setup

If you are designing in Adobe Illustrator you should flatten to one layer and all fonts should be converted to outlines. We do not, however, accept .AI or EPS files. We do accept PDF files so your design will need to be converted to a PDF. We cannot be responsible, however, for fonts not converted to outlines or images that are not properly embedded.
Acceptable file formats are JPEG, TIFF, and PDF.